Course Management
What are Courses?
Courses serve as a framework within KlickerUZH, facilitating the integration of learning activities into a structured lecture format. They enable lecturers to effectively manage various activities and challenges over a specific period, whether it's a semester or another defined timeframe. Since this framework is required for students to be able to access asynchronous activities (i.e. practice quizzes, microlearnings, and group activities), these activity types always need to be assigned to a course.
In addition to forming a framework to group together activities for a course, they also provide the foundation of the gamification concept in KlickerUZH. When students join a course, they can choose to participate in the gamification aspect, join the leaderboard, create and join groups, and earn points through activities.
How can I create a Course?
-
Starting from the course list, you can choose to create a new course, which opens the corresponding dialog. As for normal activities, you are asked to provide a course name (for your reference only) and a display name (which is visible to participants). For courses associated with a lecture or LMS course, it is recommended to use the same name for both fields to avoid confusion.
-
You may provide an optional course description, which is visible to participants in the course overview. This could include an image overview of all course activities, helping students understand expectations and point-earning opportunities.
-
You can choose the course start and end dates. These dates are used to determine the course's active period, which is important for activities that are time-sensitive and only available during a specific timeframe.
-
You can set a course language, which will be used as the default for all links and QR codes provided to you by KlickerUZH for activities included in this course. Please note that this does not affect students' ability to change the language in the student application or the language of their interface when using the KlickerUZH app to directly access course activities. In these cases, the language setting chosen by the student will take precedence.
-
To receive notifications about elements your students have flagged in asynchronous activities, you can provide a notification e-mail. If you do not have a course-specific e-mail address, this setting will default to your user e-mail address.
-
Gamification is enabled by default but can be deactivated. When active, participants can join the course and collect points, displayed on live quiz and course leaderboards. Once enabled, gamification can no longer be deactivated for the course.
-
With gamification enabled, group creation is also enabled by default. Deactivating this prevents students from creating groups and you from creating group activities. This setting can also be activated later on the course overview. If enabled, you must define the creation deadline, maximum group size, and preferred group size to facilitate randomized group creation. For detailed explanations, refer to tooltips or the documentation on randomized group creation.
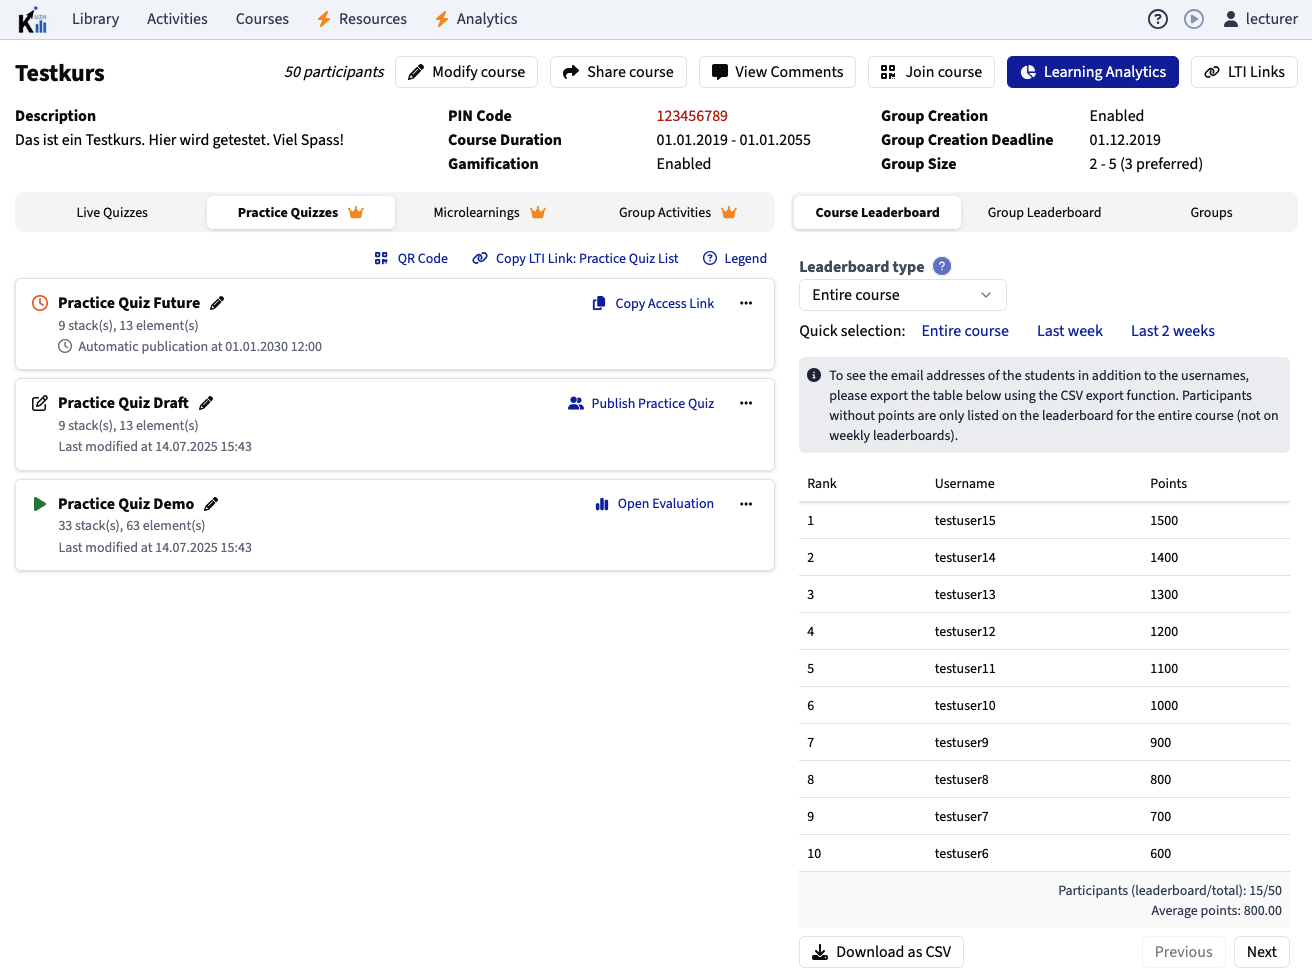
After creation, you'll be directed to the course overview page. From there, you can start learning activities, access ongoing activities, review evaluations of published or past activities. You can also manage participant groups here, obtain QR codes for participants to join the course, get LTI access links for LMS embedding, etc.
To modify an existing course, go to the course overview page and choose the corresponding option in the top right corner. Note which settings can or cannot be changed after initial setup – this information is available in the tooltip next to each input field.
Please be aware that once gamification and/or participant groups have been enabled on your course, they can no longer be disabled. You may always activate either after the creation of a course.
How can I join a course as a participant?
This section describes how students can join a course without an LMS integration. If you are using KlickerUZH with an LMS integration (e.g. through LTI or our dedicated OLAT blocks), students will automatically join the KlickerUZH course when visiting the "Account Management" block or participate in one of the available activities.
There are three ways to grant participants access to a course. When navigating to the course overview of the corresponding course, you will find the option "Join Course" in the top right corner. With the provided course link or QR code the students will be able to directly join a course or will be forwarded to an account creation page, in case they do not have a KlickerUZH account yet.
If students already have a KlickerUZH account and are logged in, they can select the option to join a course in the home menu of the application. When prompted, they can enter the PIN of the course to join it, which is displayed on your course overview page as well (in red).
All activities except from group activities, that are not part of an assessment-relevant KlickerUZH course, can also be accessed and solved anonymously. Please keep in mind that certain functionalities, such as the spaced repetition algorithm in practice quizzes or the course leaderboard will not be available to these users.